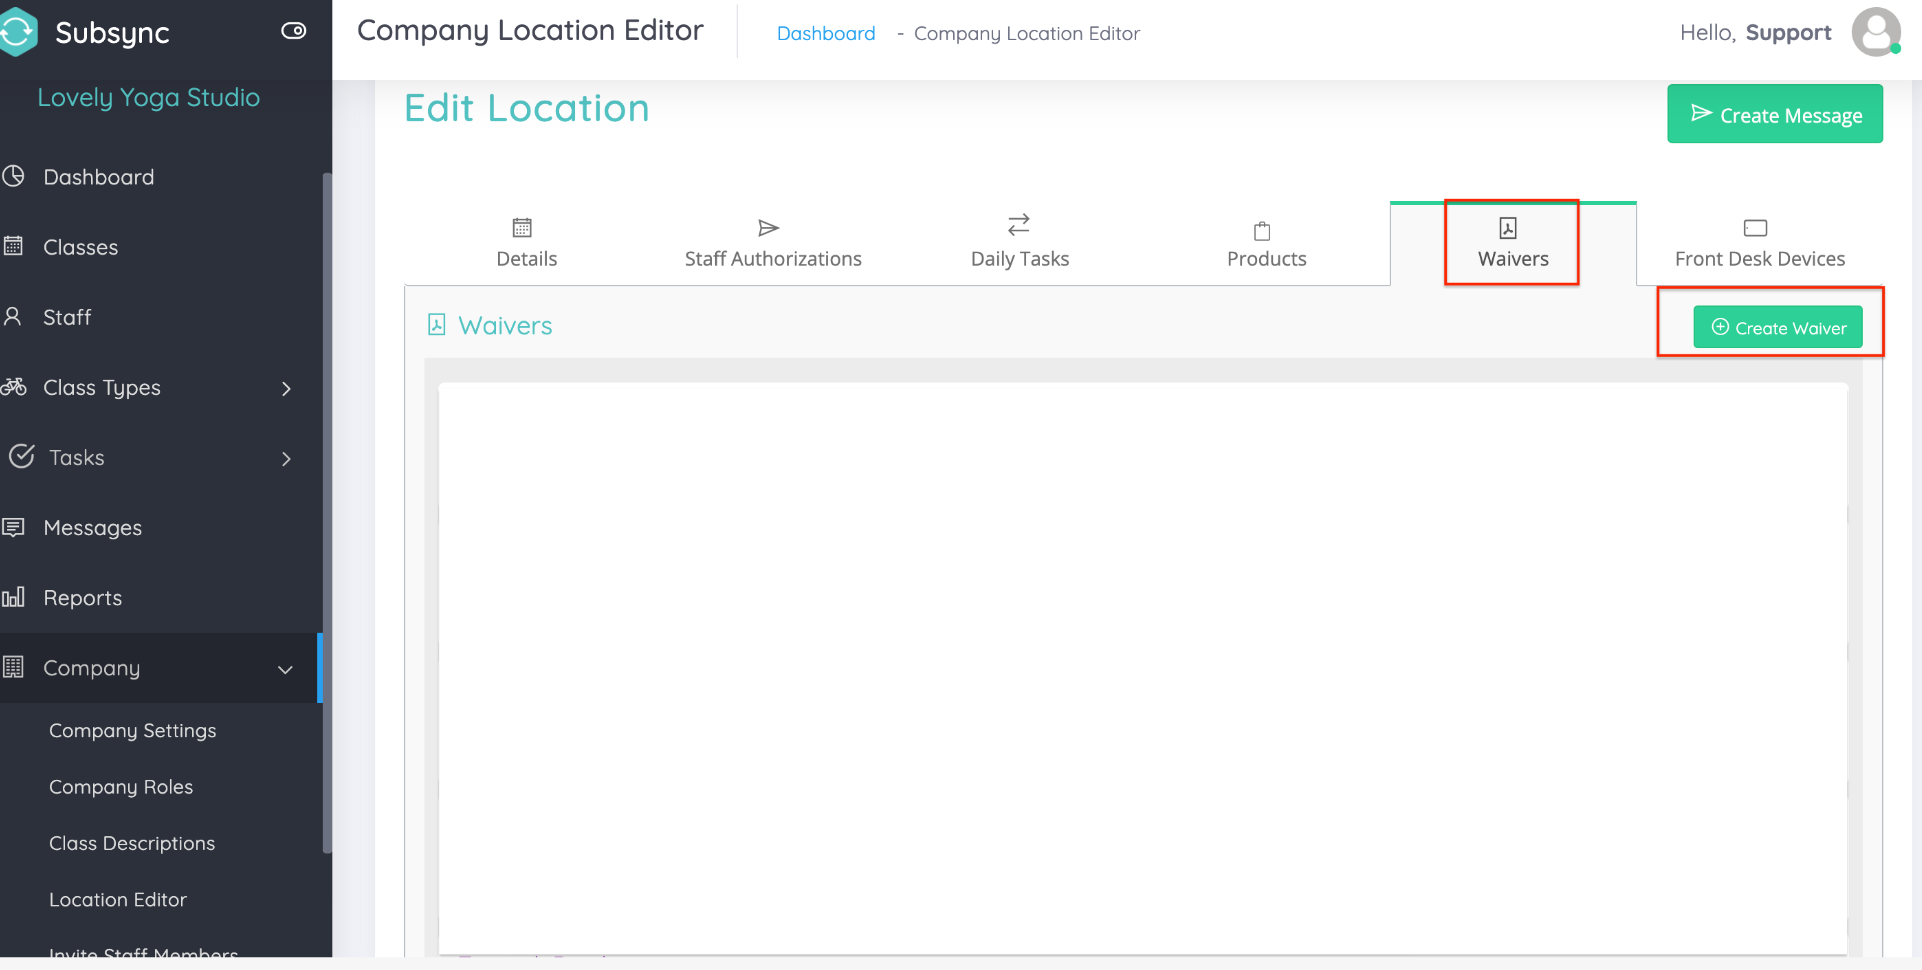
You can easily create a waiver by clicking on the Waiver tab in your Location Editor.
Go to:
- Company
- Location Editor
- Select the Location
- Click Waiver tab
- Click Create Waiver
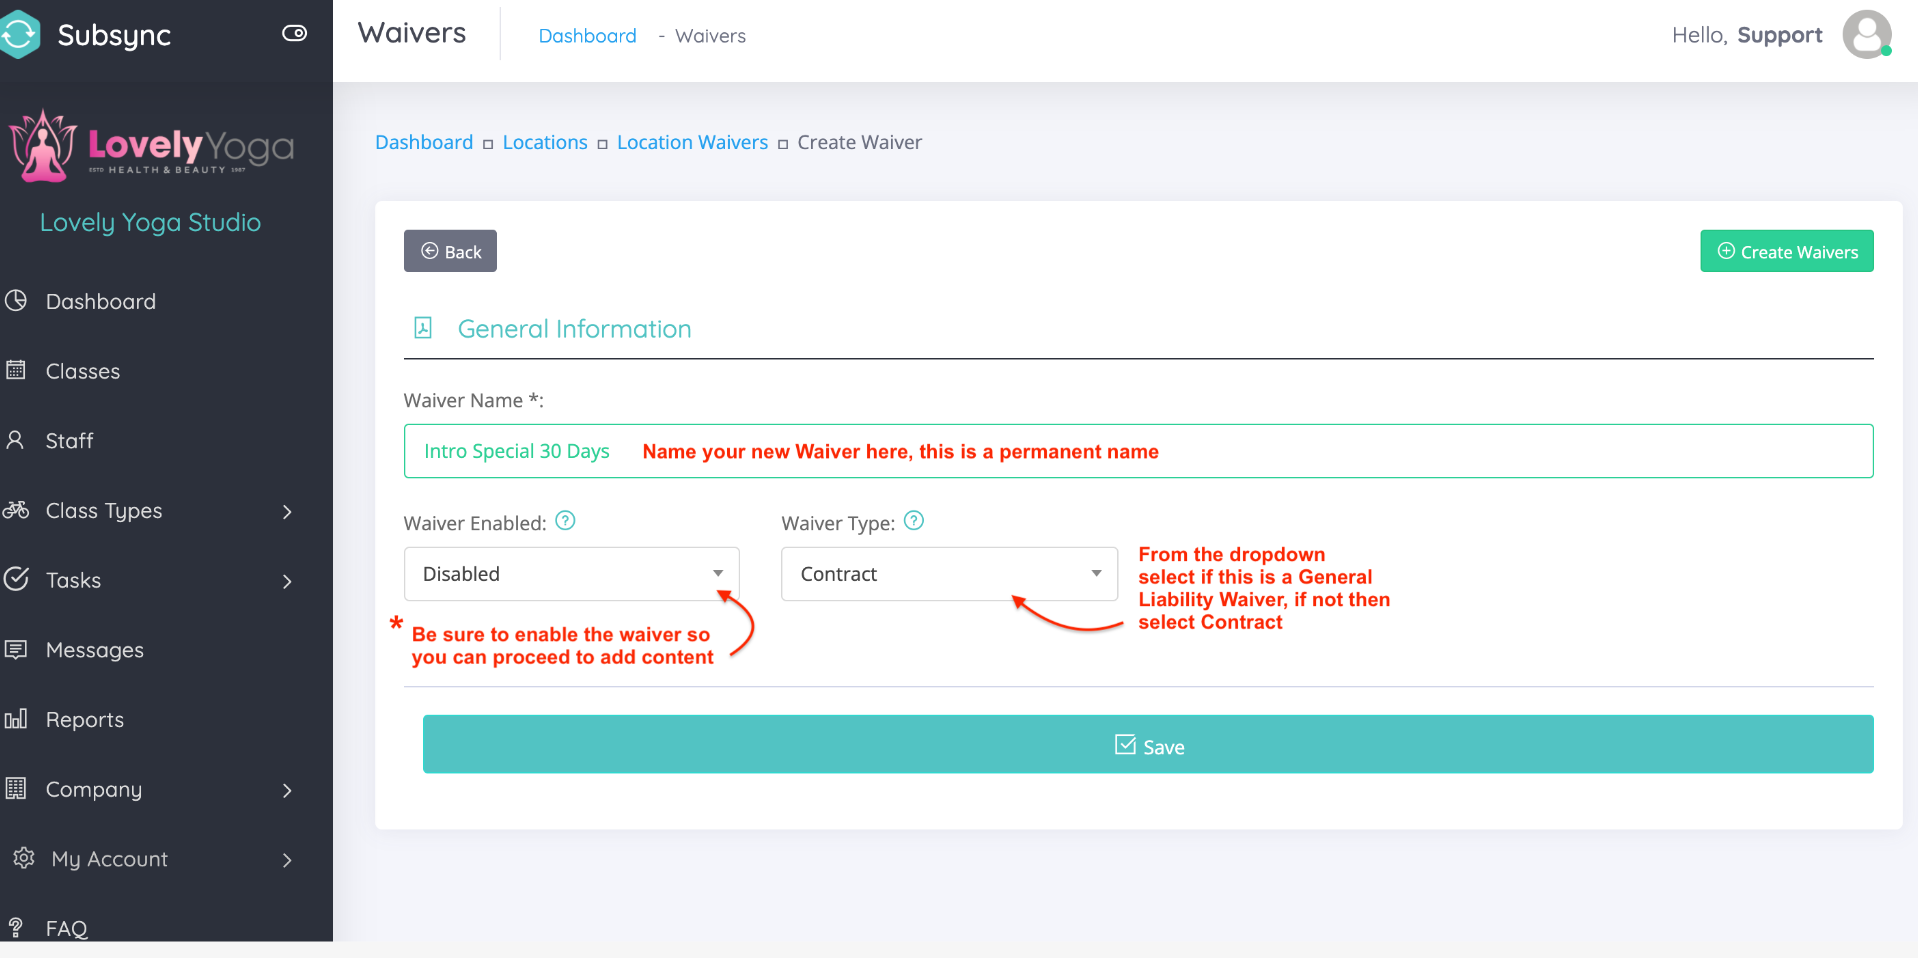
Name your Waiver, this is a permanent name, so be sure to type this correctly.
Select from the dropdown menu to enable your Waiver Type (If this is anything other than a General Liability Waiver select Contract as your option)
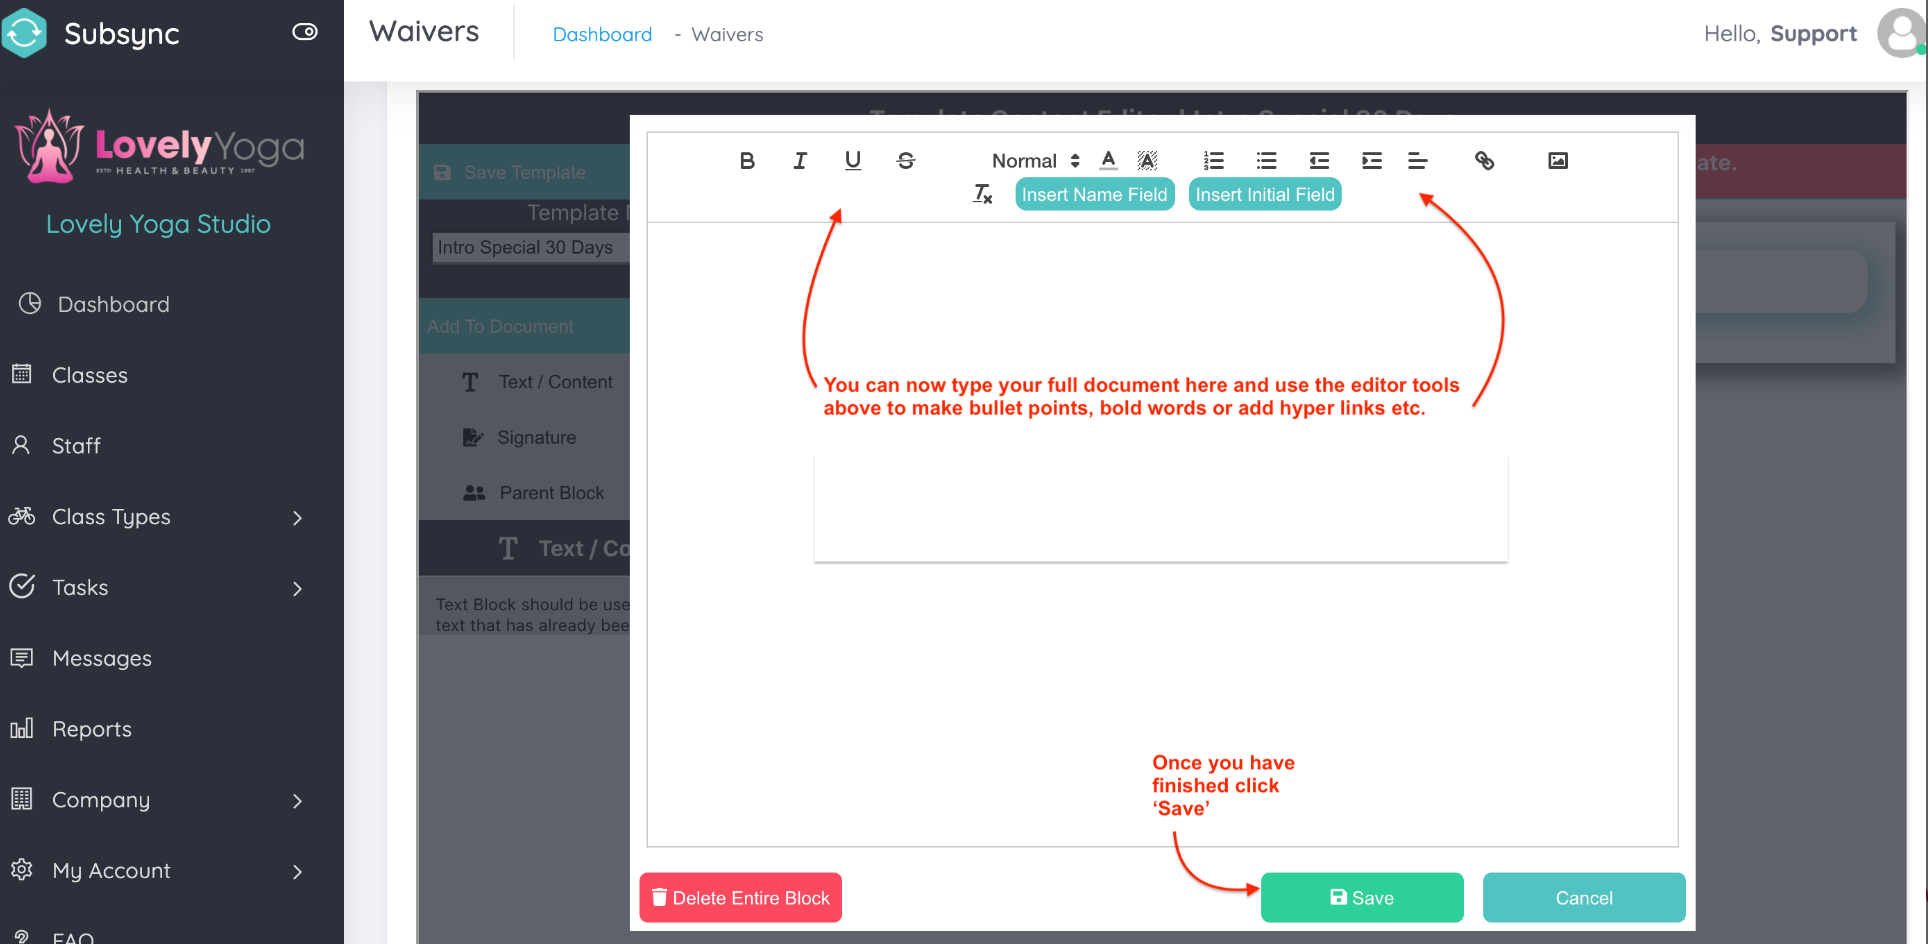
Click to add text to your box.
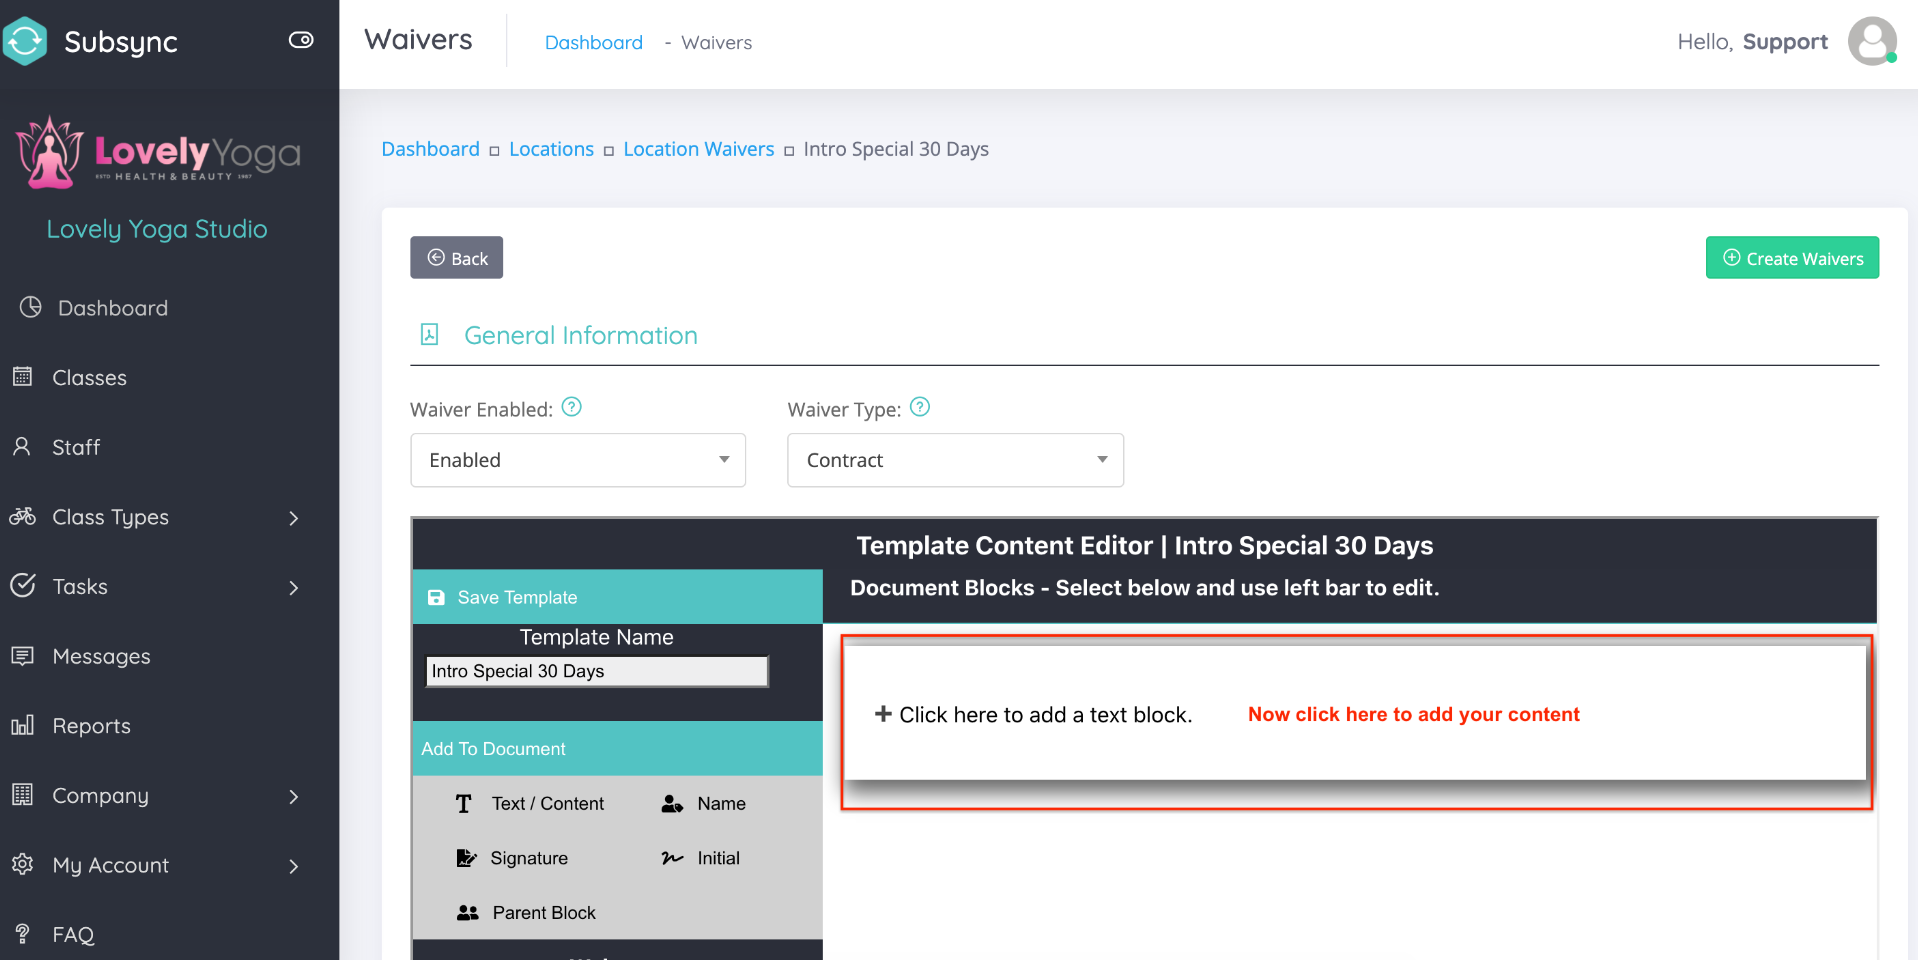
Edit as needed using the formatting tools in the top area.
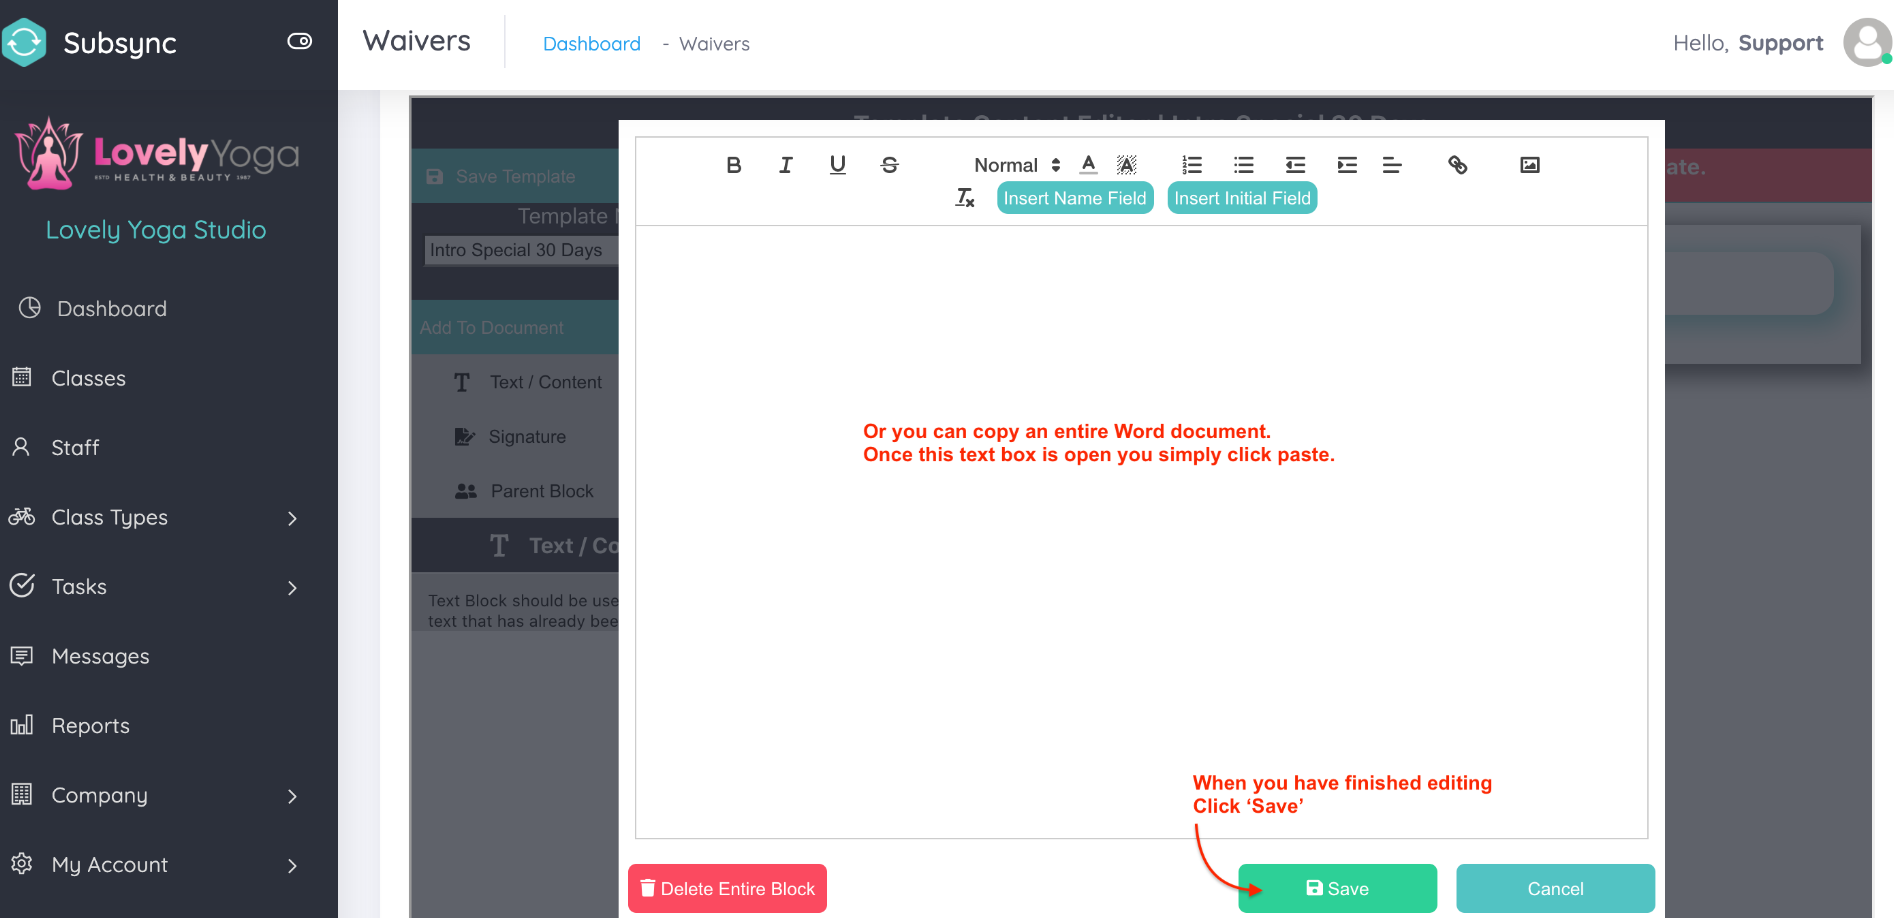
Or you can easily copy an entire word document from one of your own files and simply paste it into the text box. Click Save.
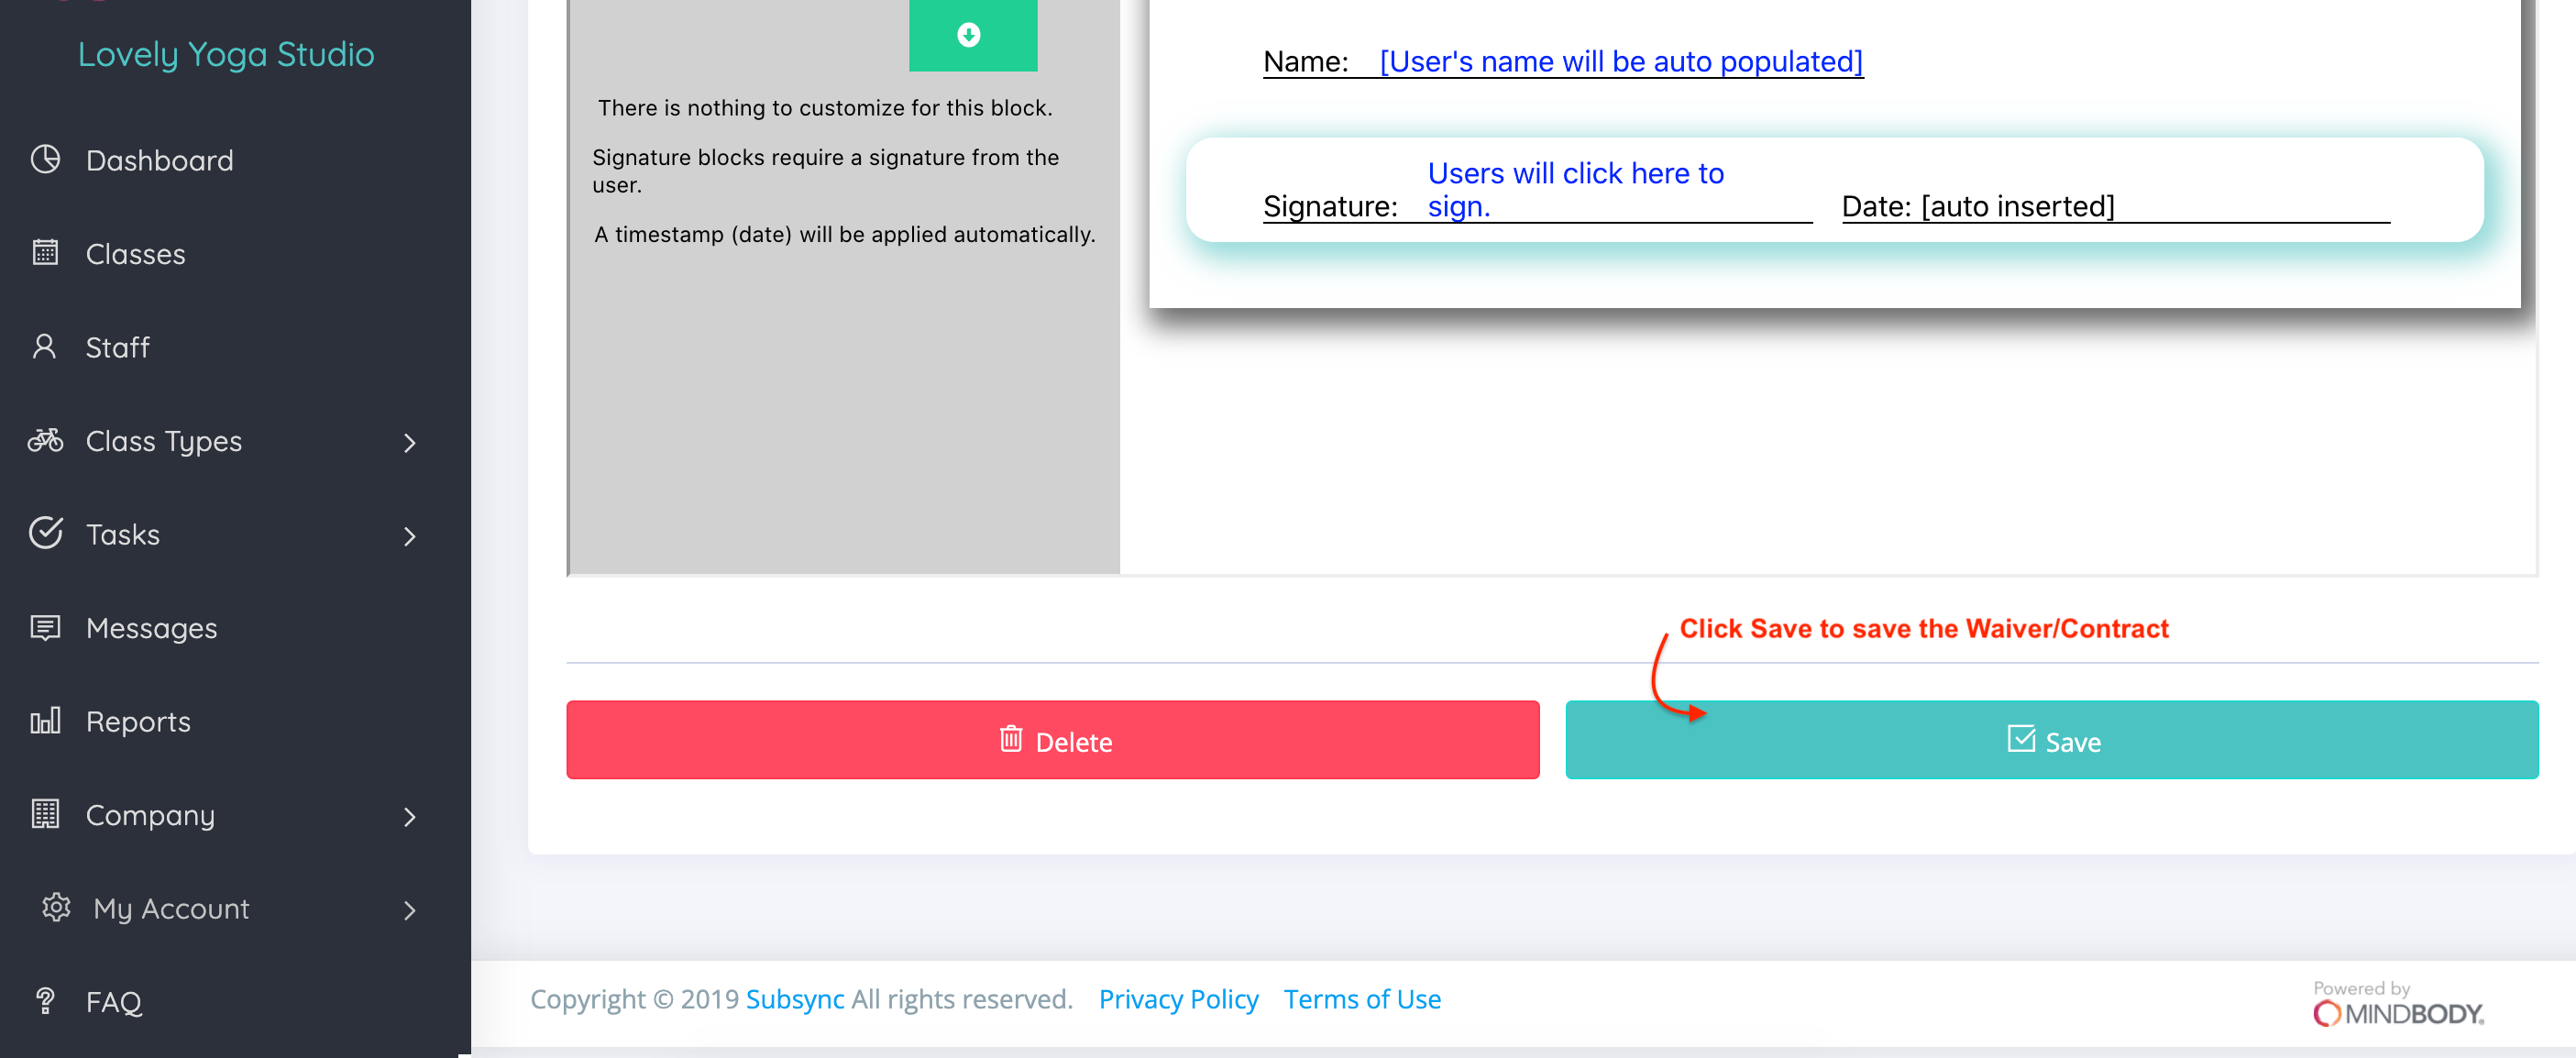
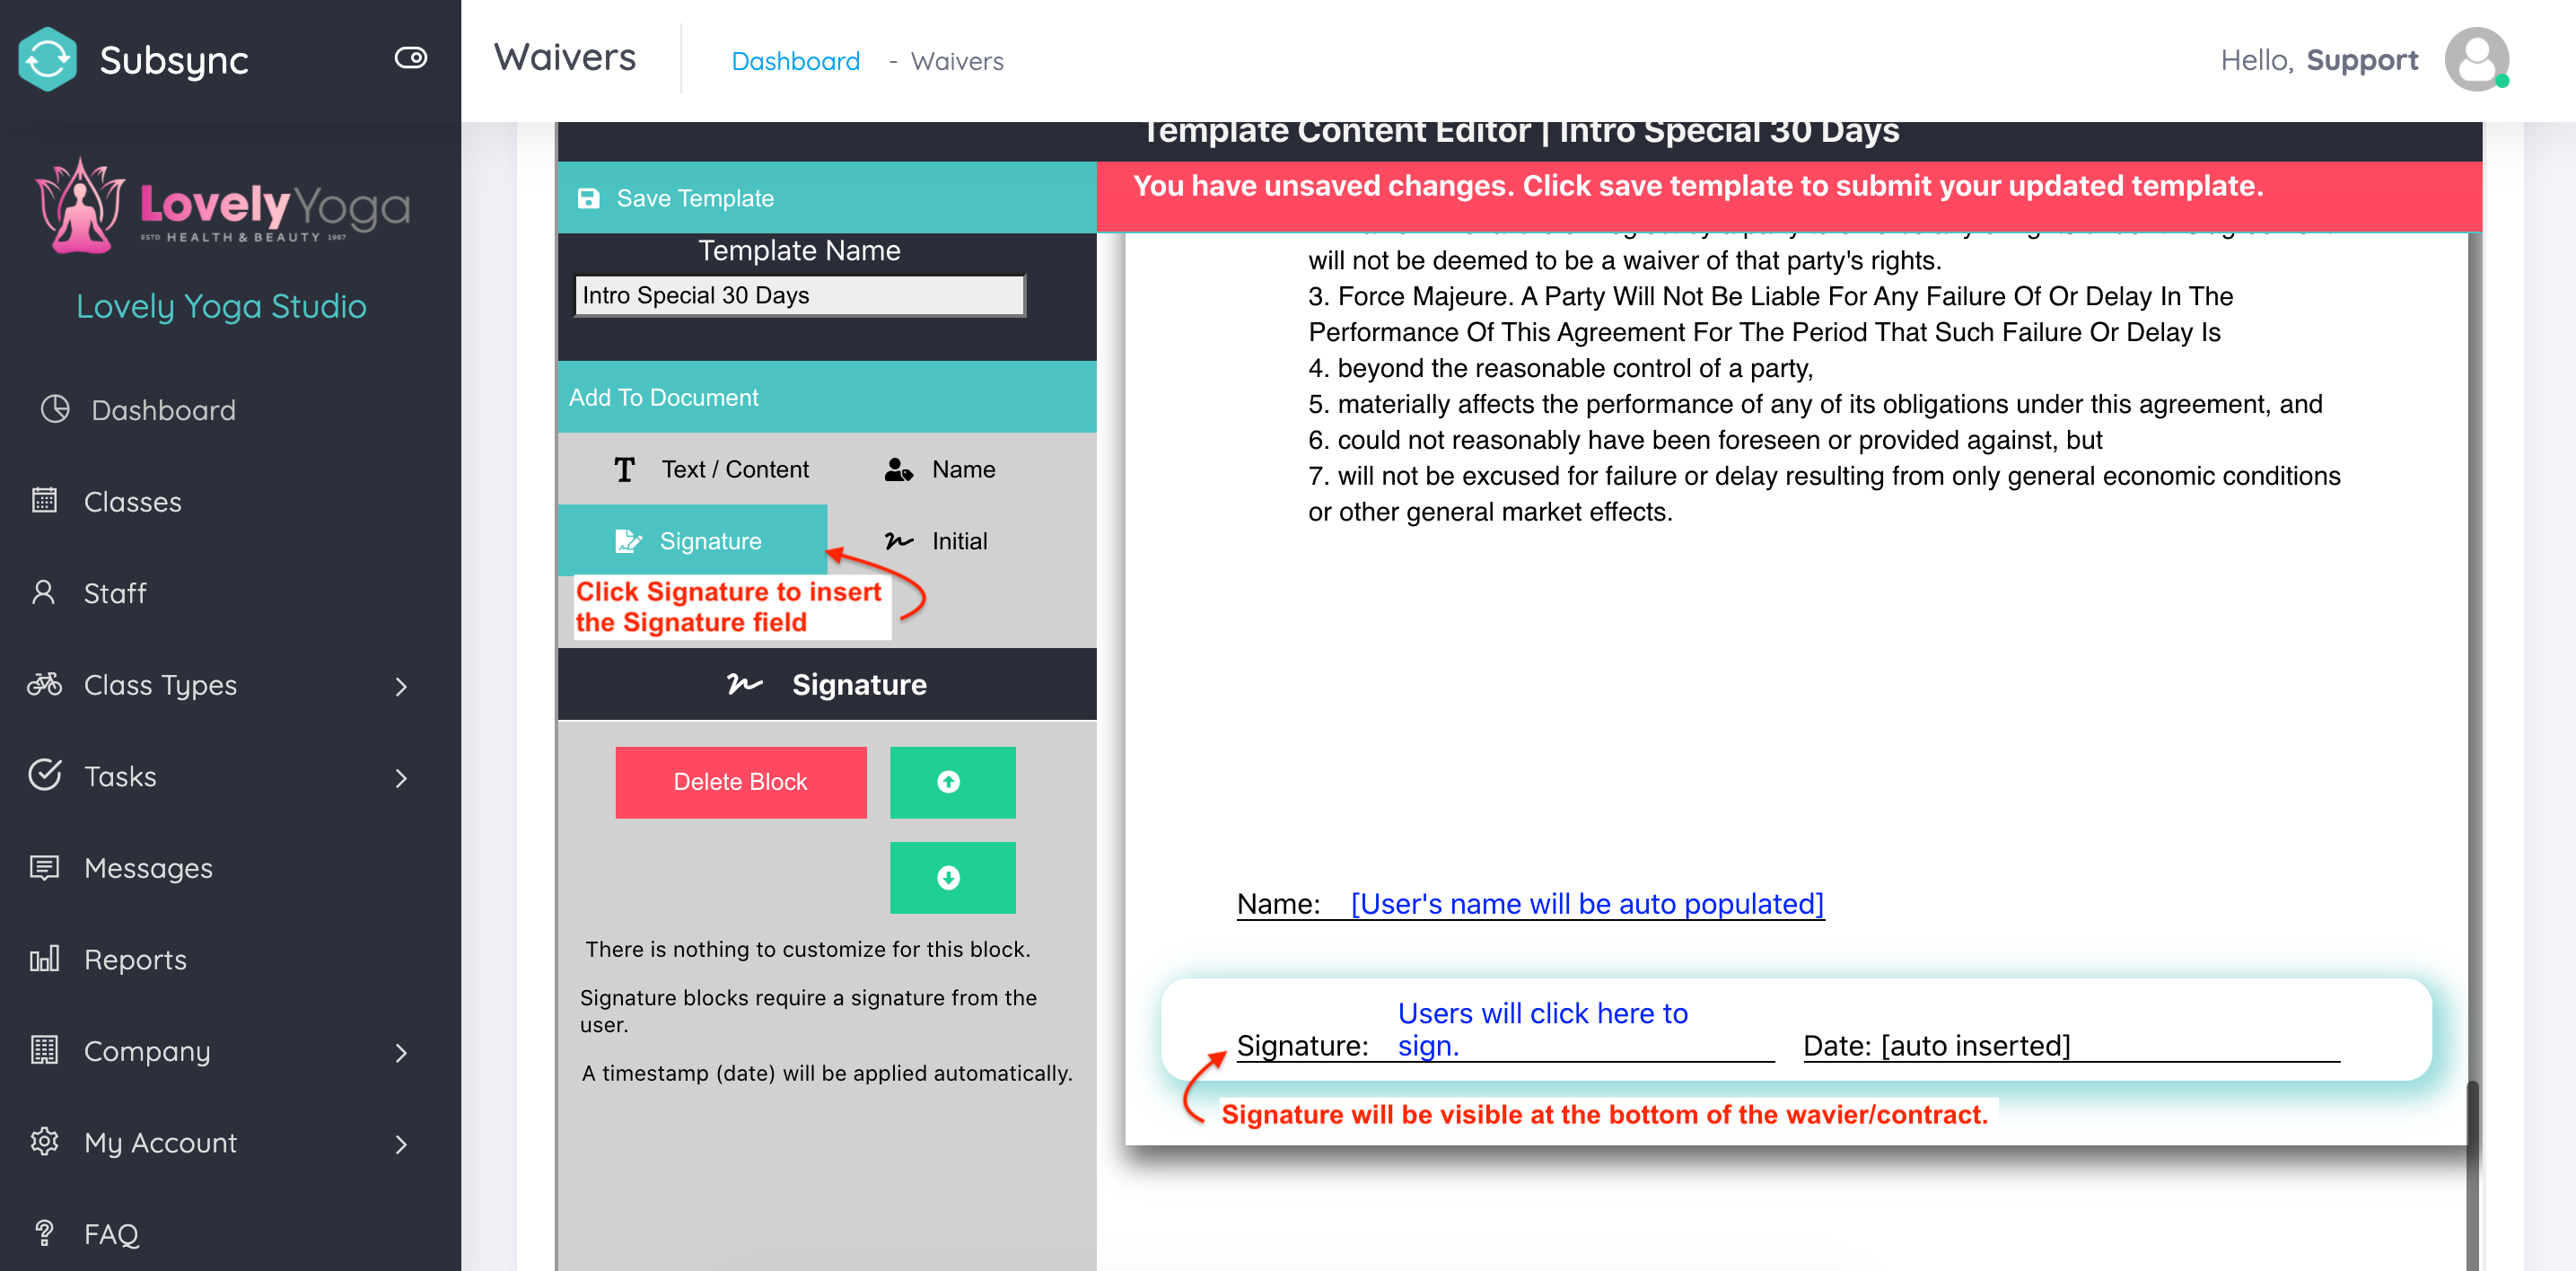
Once your text area is complete, you need to add two main fields to ensure your client is completing a full Waiver/Contract Signing.
- From the left side of the Template Content Editor you can click 'Name'. This will ensure your clients name is Autopopulated when they are signing the document electronically.
- Next click Signature. This will require your client is electronically signing the document and agreeing to its terms and conditions.
Once you have inserted the fields you require for your document Click Save in the Template Editor.
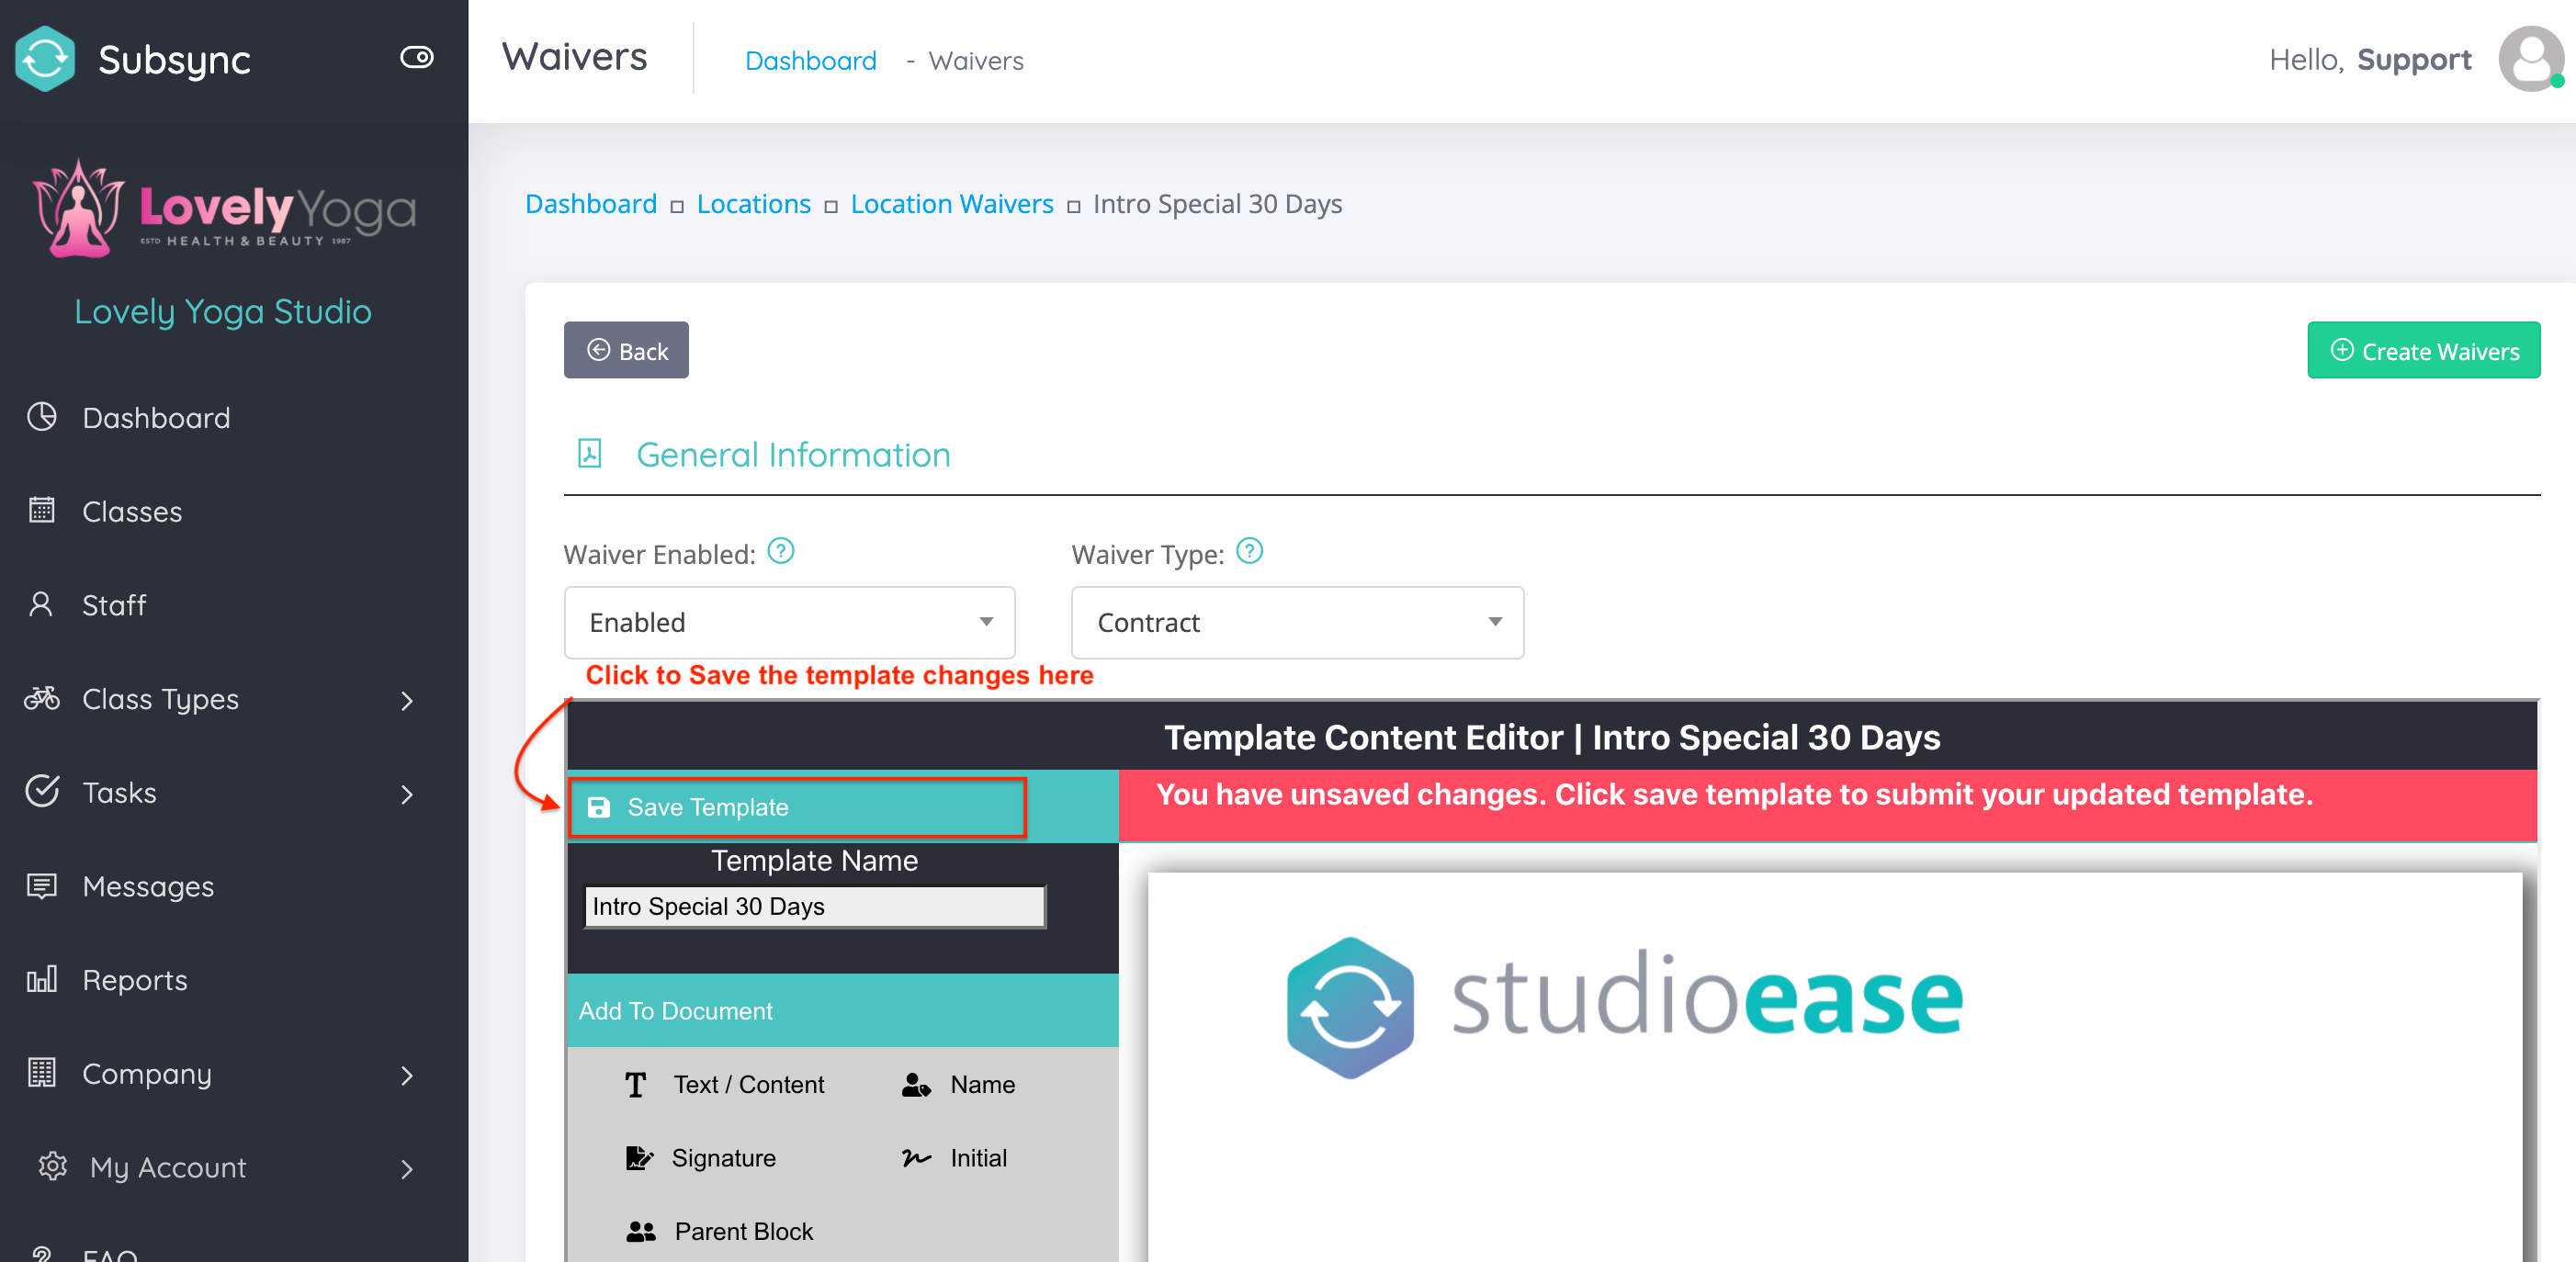
Then Click Save at the bottom of the screen to save the completed document to your account so it can be assigned to your Products.